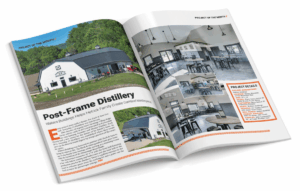
By Andrew Mullen, Direct Metals Inc.
The Green movement is everywhere right now, but many of us were “green” way before it was the cool thing to do. The post-frame building industry has been a huge supporter of the use of polycarbonate translucent panels to provide daylighting. Taking advantage of our largest free resource, they use the sun to provide light when otherwise they would need electricity to do so.
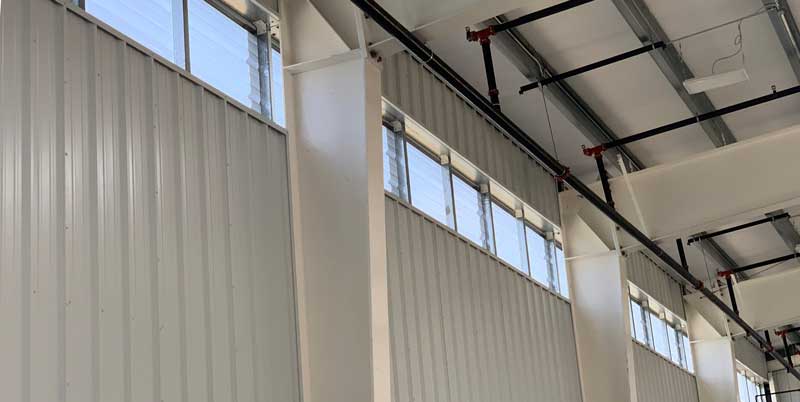
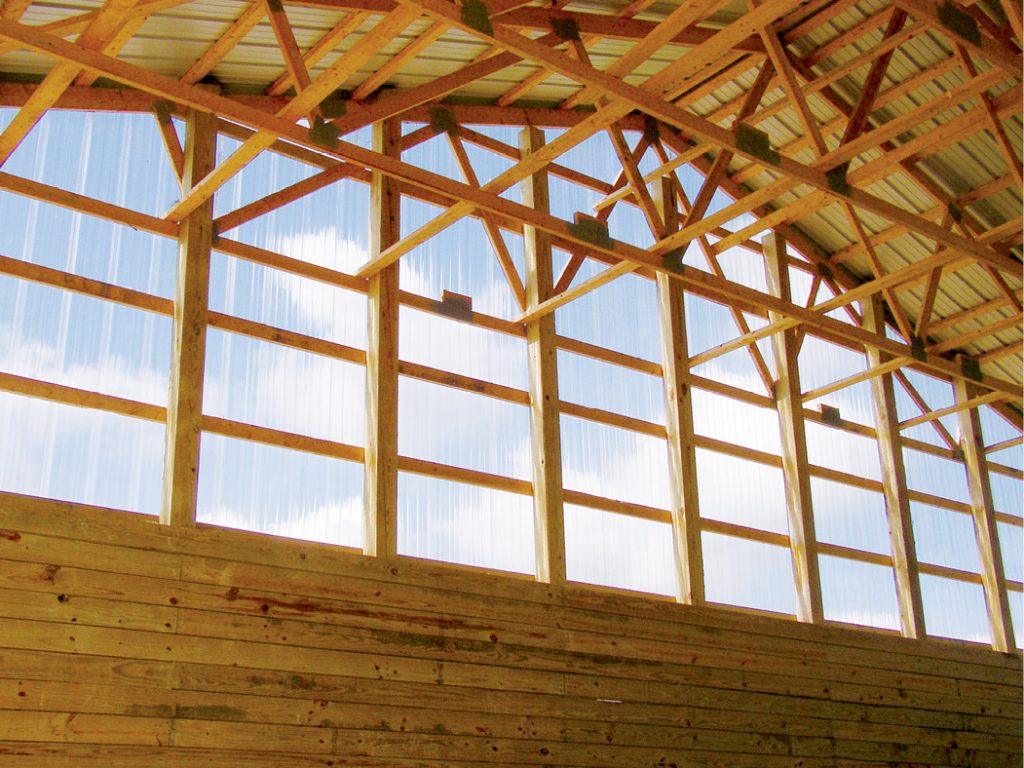
Corrugated translucent panels that mate to popular metal roofing profiles have been an economical and effective daylighting solution in many building applications, including warehousing, animal confinement, hobby sheds, and commercial greenhousing. Choosing the right panel to fit a building’s needs can be a difficult decision to make with the many choices of manufacturers, colors, and thicknesses/grades of product now available on the market.
Corrugated polycarbonate is no longer limited to just a 0.8mm-thick clear panel designed to span 2′ centers; there are now thicknesses up to 2.0mm, designed to span 5′ centers, making polycarbonate panels a viable commercial building daylighting solution. As important as selecting the correct product for your application is, the correct installation and maintenance to ensure an extended life cycle of the product is paramount.
The Right Panel for Your Application
Start with identifying the panel profile that you will need. There are over 300 profiles of translucent and metal panels available. The corrugated profile you choose should closely match the accompanying metal building panel that the translucent panel will pair with.
If your application calls for an entire roof or sidewall system to be translucent, then the profile may not be important. In this case, we would suggest an R-panel profile that would afford you the most standard choices of thickness and color. Once you have selected the preferred profile, you can move forward with color and thickness options.
Color Choices
Choosing a color will determine how the new panels will transmit light:
Clear Panels: These colorless panels provide up to 90% light transmission. If you choose clear, you will have a direct, concentrated beam of light.
Be aware that choosing a clear panel to be dropped in between metal panels (such as a warehouse skylight) can have a “window frame” effect directly on the floor below—the skylight can create a hot spot where the majority of the light from the opening is concentrated in one area. You should choose a clear panel if your project requires the panels to be see-through, making them best suited for full roof or sidewall applications such as a greenhouse, porch, or gazebo roof.
Opal White and Soft White Panels: In the case of a soft white panel, there will be between 45% and 85% light transmission. These panels are semitransparent, letting light through, but they are not clear.
These white panels work to diffuse light, sending it in many different directions. This is the reason white and soft white panels are ideal for “drop-in” skylight applications such as warehouse skylights, where the customer wants the best lighting and not the absolute highest light transmission number. The white panels provide even lighting and avoid the “hot spots” that can be associated with clear panels.
Specialty Colors: The available varieties of colored panels include cream, misty green, bright green, bronze, solar control silver, and reflective silver. Most of these specialty colors have light transmission numbers of 20% to 40% and are found in extremely limited profile offerings.
While many of the specialty colors are only available in 0.8mm thick panels, the newest technology in profiled polycarbonate panel colors is reflective silver panels, which are currently only available in 2.0mm thick R-panel or ridge cap profiles. These panels reflect up to 200 times more heat than a clear panel, leading to cooler building interiors. This reflective technology and 2.0mm rigidity make them suitable for warehouse applications in southern and coastal areas subject to a lot of sunlight and windstorms.
Panel Thickness Choices
Choosing a panel thickness will be determined by your performance expectations. Factors to consider include:
- Spanning ability needed
- Snow load needed
- Environmental factors, such as hail and windstorms
It is important to consult the manufacturer’s recommendations for framing requirements needed to support the different thicknesses of translucent panels. Many manufacturers specify purlin spacing for 0.8mm panels to be 2′ on center, where 1.5mm-thick panels have been tested to withstand hurricane force winds with 5′ on-center purlin spacing.
Corrugated polycarbonate panels are commonly available in 0.8mm, 1.0mm 1.2mm, 1.5mm, and 2.0mm panels. As the panel thickness increases, the panel will provide larger hail resistance, higher snow load capacity, and higher wind pressure resistance. These resistance abilities can also vary between profiles, so if your profile is not important but ultimate load capability is, we would suggest the 7.2 corrugated panel or a thicker R-panel variant.
Building Code Compliance
Forces that exact change in building codes can be small or large, some as large as the force of hurricane winds; the same winds that necessitate building codes and standards in Florida.
Building codes promote the use of higher quality materials that are expected to increase the structural rigidity and extend the life of the building. These standards are quickly being specified, adopted, or mandated by many coastal cities, counties, and insurance bodies to encourage responsible building practices.
Examples of code requirements and recommendations include the 2014, 2017, and upcoming 2020 code version of the Florida Building Code, which requires wind load testing for structural translucent roofing panels. Other governing bodies, such as the Texas Department of Insurance (TDI), also have guidelines and an approval system for translucent panels. If you are building in an area with building code regulations, it is suggested you determine if your panel choice has an approval or certification number(s) to meet your local building code guidelines prior to purchasing.
Cost Concerns
When choosing a translucent product, if you are weighing the choice between an entry-level 0.8mm economy panel and a higher performance 1.0mm, 1.2mm, 1.5mm, or 2.0mm panel, it is important to factor the extra cost into perspective within the roofing systems total cost.
Upgrading from an entry-level 0.8mm to the strongest 2.0mm may cost three to four times as much on a per panel basis, but this could translate to as little as 0.002% of the cost of a 16,000-square-foot commercial building.
To determine the best value proposition, it is important to understand the performance expectations of the client. It is also important to take the total cost of the project into consideration, especially in the case where additional purlins would have to be added to a project where a thicker panel could have provided the structural integrity needed at a much lower cost. When properly installed, the energy savings provided by these panels should surpass the final cost of the installed product.
Installation Tips
When installing translucent panels, there are a few key processes used to ensure the proper life span of the products:
Sawing, Cutting, and Drilling: Most polycarbonate panels can be cut or sawed by manual or power tools. A bench/table circular saw using a 128-tooth blade is preferred, but portable circular saws can be used in a pinch for on-site cuts. Avoid intersecting cuts—if one must be made, drill a hole at the intersection point and then saw to that point. Be sure to wear work gloves and protective eyewear while cutting, and use the gloves to clean up rough edges once cool.
Predrilling Fastener Locations: As polycarbonate panels expand and contract at a higher rate than metal panels do, it is necessary to predrill all fastener connections with pilot holes larger than the fastener diameter. Manufacturers suggest oversizing the hole by 1/16″ to 1/8″.
There are some winged fasteners available on the market that predrill and tap into wood substrates, lessening the labor needed for a proper install; however these fasteners work well on thinner 0.8mm panels but not as well on 1.5mm and 2.0mm panels. Due to the oversized holes, it is suggested that fasteners with ¾”- or in some cases 1 1/8″-diameter sealing washers be used to ensure a watertight seal. Examples of these types of fasteners can be found here: www.directmetalsinc.com/wp-content/uploads/2018/07/1-2018-Fasteners-for-the-installation-of-translucent-panels-Guide.pdf.
The panel manufacturer or distributor may require specific fasteners to be used, so be sure to check prior to the installation of any warranted panel. Panel predrilling is best done at a 90-degree angle with a drill bit designed for metal with a drill speed of 1000 rpm.
Fastener Installation and Tightening: Do not overtighten fasteners—this will cause the rubber washers to fully compress. It is best to use electric screw guns with torque-sensing devices and not impact drivers. Always drive the fastener perpendicular to the surface of the panels until seated. If the washer deforms, the fastener is too tight.
Sealant, Adhesive, and Chemical Compatibilities: While polycarbonate panels are resistant to a variety of chemicals, many sealants, paints, coatings, adhesives, and insulation backings may be adverse to the material. A reaction to sealants may look like spider cracking within the panel, weakening the panel’s integrity. Prior to installing, it is suggested to consult a pretested list of sealants, adhesives, and coatings from the manufacturer. If your manufacturer does not provide a list, one can be found at www.directmet alsinc.com/wp-content/uploads/2017/04/Sealant-Compatiblity-Chart-for-DMI-Polycarbonate-Sheets.pdf.
In addition to new sealants used, care must be taken to remove old butyl tape and sealant residue in retrofit applications, as well as to tuck back vinyl-backed insulation so that it does not contact the panel. Attention to the chemicals used during install, and using non-ammonia- based cleaners such as soap and warm water to clean the panels, will have your panels looking great for years to come.
We hope this article helps you avoid making the three most common mistakes when choosing and installing a translucent panel: choosing too thin of a panel, choosing the wrong color for your application, and screwing through a panel without predrilling a clearance hole, as if it were a steel panel. When these factors are taken into consideration a building owner can enjoy many years of trouble-free daylighting. FBN