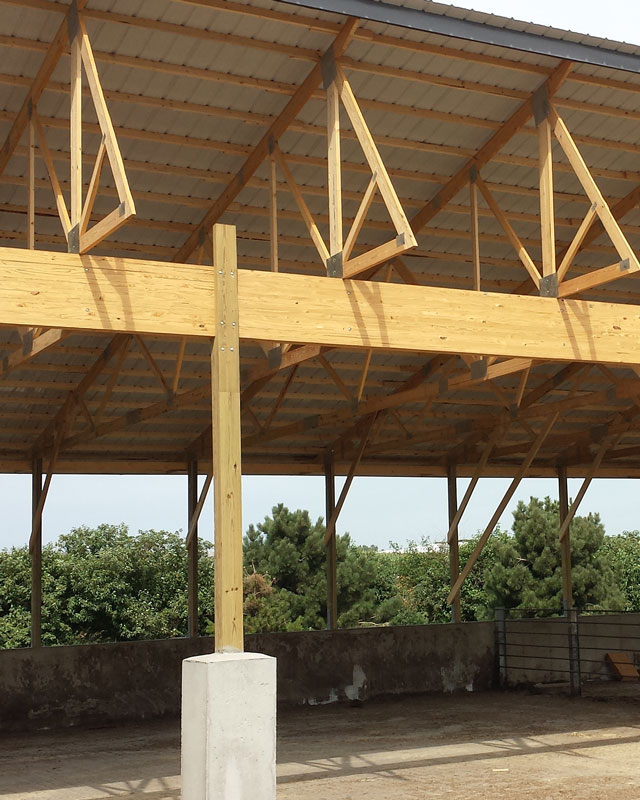
Glulam columns manufactured from specially selected and positioned lumber laminations are designed for strength and performance. They function well in post-frame column applications because they remain straight and true in cross-section. Providing very high compression strength and architectural appearance, this framing can run from floor to ceiling with one continuous piece. But to attain this load-bearing capacity and structural stability, it must be prepared and installed correctly. Here are tips on how to do that.
Handling and Storage
Even before installation there are best practices for glulam column handling and storage. According to Mike Momb, “The Pole Barn Guru” and technical director at Hansen Pole Buildings, “If the glulam columns are not used immediately, store them in a dry place. Moisture may cause decay to untreated column portions over time. Avoid direct sunlight.”
Momb said other important guidelines for them include:

• Do not unload columns on rough terrain or uneven surfaces, as these could cause product damage.
• Do not walk on flat lying product. It is extremely dangerous and could result in injury.
• Columns should be stored in a horizontal position. Use support boards of equal dimensions no more than four feet apart for support and to prevent them from sitting directly on ground.
• If bunks or units of columns are stacked on top of each other, support boards must line up vertically (i.e. no staggered placement).
“If outdoor storage cannot be avoided, protect with a waterproof barrier. Leave the bottom of cover loose to allow air movement,” Momb said. “Protect columns from weather, corrosion, bending, damage, insects, and any other deterioration when stored. It is your responsibility to properly receive, unload, store, handle, install and brace to protect life and property. If improperly handled, installed or braced, columns can become dangerous and can cause property damage and/or bodily injury.”
Clay Erb, outside sales representative at Timber Technologies said like any wood product glulam has a tendency to acclimate to surrounding conditions, so moisture, humidity, and support will influence the appearance and overall long-term condition of the columns. “All dunnage should be aligned while being stored to prevent warping. Material should be kept wrapped or covered, dry and level while being stored on edge to keep the columns in the best like new condition possible. When shipping, the load should be tarped if the units are not wrapped.”
Moved, Lifted, Inspected
Typically, glulam columns are transported in bundles similar to a lumber pack and should be handled with the appropriate equipment. “Any skid loader, forklift, or other equipment must be rated for more than the bundle weight being handled,” said sources in the engineering group at Rigidply Rafters Inc. “Lifting should always occur at the balanced center — or the balanced lifting points, if appropriate — of the bundle length to balance the weight and avoid tipping of the unit.


If a glulam column bundle is being stored outside, it should be stored on blocks to provide air flow from under the bundle and to allow easy access for forklifts if it is moved. “Bundles being stored outside should be covered with a waterproof material to protect the material from direct moisture due to rain, snow, or dew,” said sources at Rigidply Rafters. “Length of storage outside should be limited to prevent the propagation of mold,” they added. “In areas plagued by termites or other wood-borers, the term of outdoor storage should also be limited with periodic checks on the condition of the columns.”
When inspecting columns at time of delivery and before installation, Momb said to inspect for:
• Quantities and lengths to correspond with shipping ticket and material takeoff.
• Cracked, dislodged, or broken members.
• Any other damage possibly impairing columns’ structural integrity.
Preparing to Install
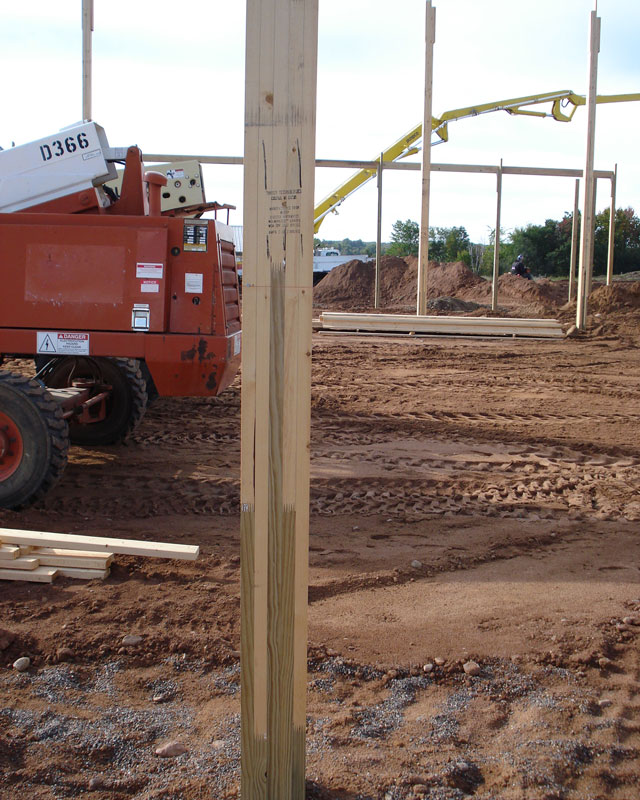
What are some best practices for preparing to install glulam columns in post-frame buildings? Verify that column layout is correct, Erb said. “If using brackets, verify brackets are correct for the columns being used. Almost all manufacturers end up with different final sizes. Nail lams and glulam final sizes will vary significantly because of the manufacturing process. Verify brackets are properly anchored per engineer of record. If in the ground, verify hole depth and frost line per engineer of record. Verify substrate is adequate for support or concrete cookies, pads, or poured concrete will be utilized per engineer of record. Determine uplift requirements such as rebar, blocks, or uplift plates per engineer of record.”
An important first best installation practice is to select a glulam column that is (1) adequately designed and sized to handle the design loads of that particular structure, and (2) uses a preservative treatment and treatment process that matches the use of the column.
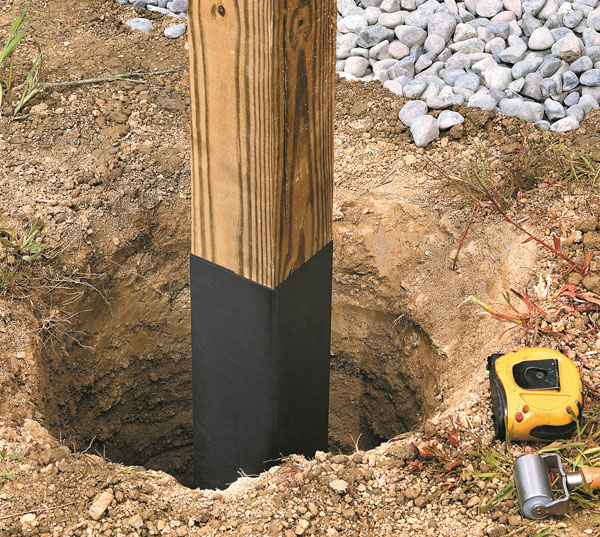
Properly selected glulam columns will perform their required function for the life of the structure. Sources at Rigidply Rafters said that if the columns are to be embedded below grade, “The post holes must be augered to the proper depth and cleaned out, installed on a clean (no debris), adequately sized level footing, and installed on the center of the footing (unless the building plans specify otherwise). If they are to be installed on a pier or concrete wall, the bearing surface must be clean and level. In addition, the columns must be installed with direct bearing (no gaps) on a concrete surface or base bracket. This ensures that the column is not ‘suspended’ by the bolts or fasteners and it transfers the axial loads directly to the wall or to the base of the bracket and then into the wall.”
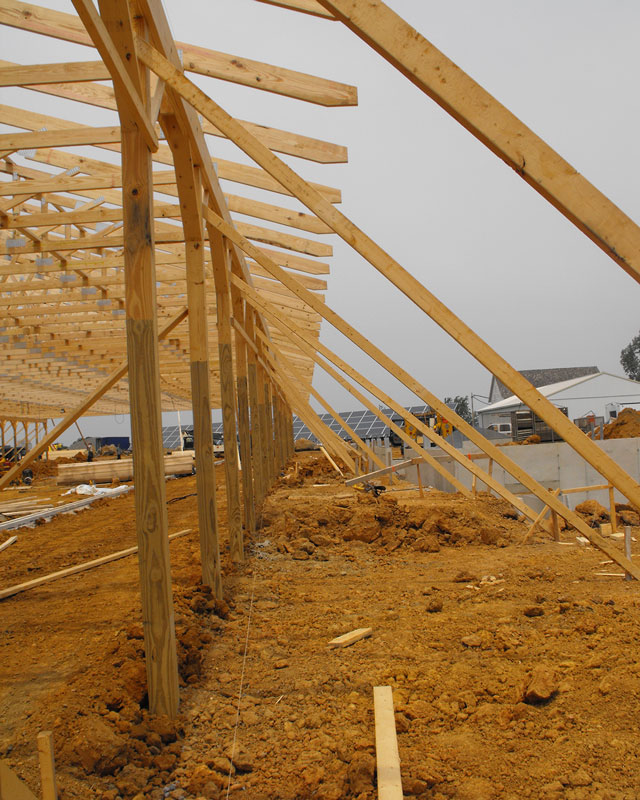
Alignment and Positioning
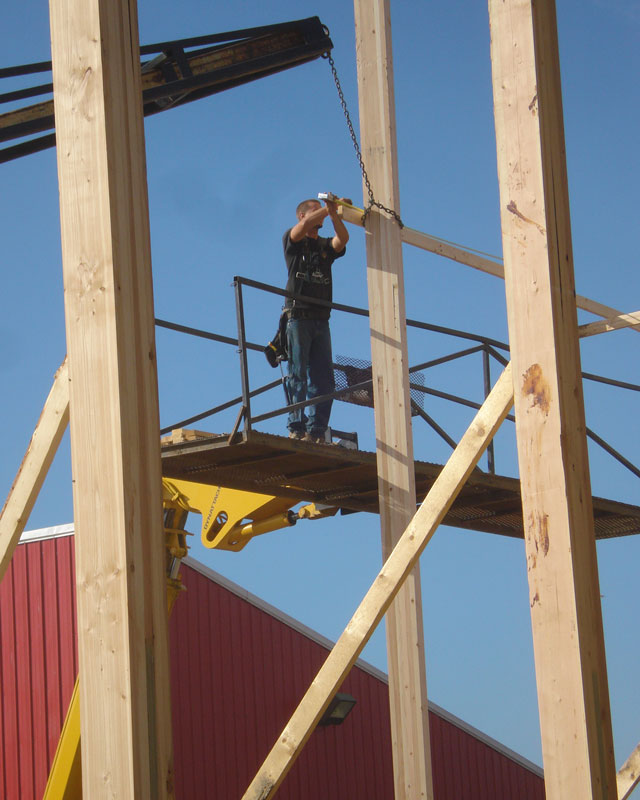
Laser levels or lasers are a great tool for aligning and plumbing glulam columns, because they can project a horizontal or vertical line. They also can be used to provide precise measurements for spacing and placement of columns. If a laser level is not available, a string line and 4’ or longer level will serve as adequate tools for aligning and plumbing columns in a wall line.
Erb said string lines generally are still the “go-to for setting columns regardless of how perfect and straight your columns are. Corner chain sets and come-alongs are the simplest square-up method for final squaring your project before setting trusses.”
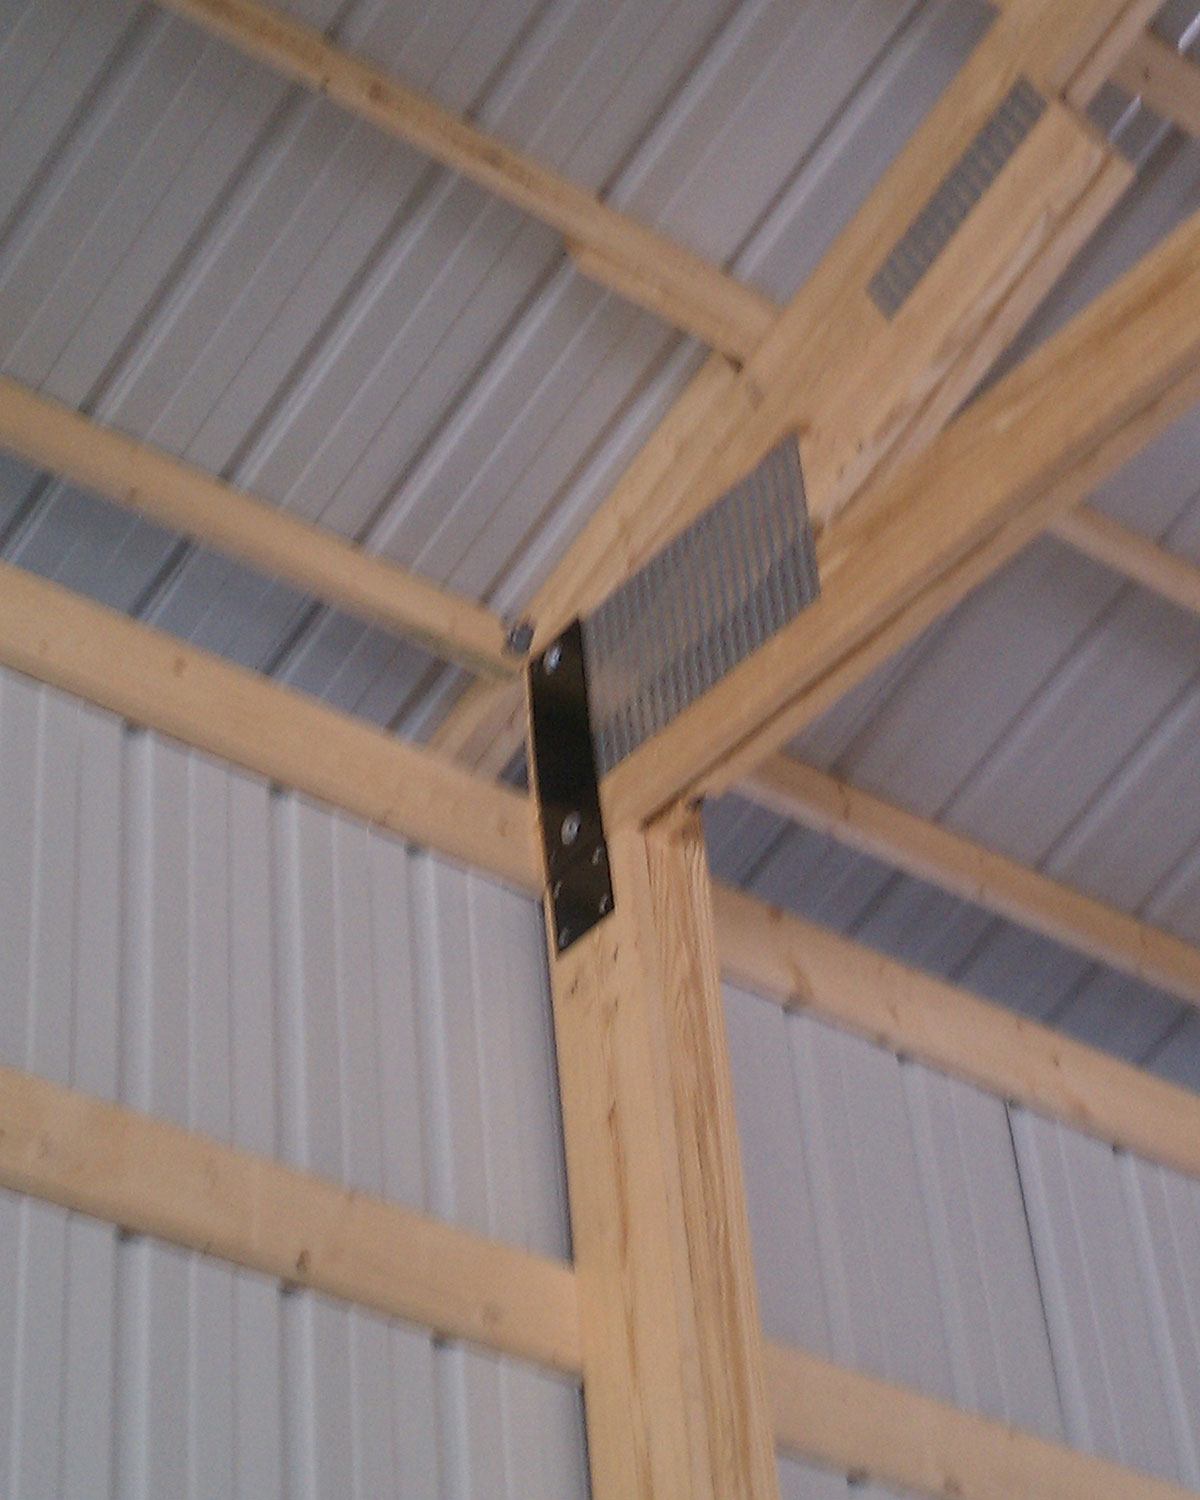
Another best practice is a column plan showing the exact locations of the columns, as well as the proper orientation of the columns. “A building section showing the proper embedment depth (if applicable) and wall height is key to properly installing glulam columns,” said sources at Rigidply Rafters. “Detailing of column base connections to footings or walls, truss connections to columns, wall girt spacing, and any other connections to a column are critical in order to ensure the load path through the column to the footing is completed.”
Hole Depth: Too Shallow or Too Deep
Sources at Rigidply Rafters said the most common error in embedded glulam column applications occurs when the hole depth for the footing is drilled too shallow or too deep; typically, the error is on the shallow side. A hole that is shallower than specified can result in the any of the following conditions:
• The bottom of the column may be above the frost line, resulting in possible shifting or heaving of the column during extremely cold winters.
• If a concrete collar or treated wood collar is used at the bottom of an embedded column, the uplift capacity generated by the collar due to the soil cone above it will be reduced.
• The structural mechanics of a column change with embedment depth, and a shallower-than-specified embedment will cause the bending moment capacity to be reduced at the critical section of the column, changing the location of the inflection point due to lateral wind loads.
If a glulam column with partial treatment is placed too deeply, Rigidply Rafters said it “may result in the untreated joist/girt/plate/etc. between treated and untreated lumber being too close to the groundline and can make it susceptible to termite damage. According to most industry documents related to lumber treatment, for example, the minimum distance from grade to the lowest untreated wood is recommended to be at least 12″. Check your project requirements for verification of this distance.”
Wrong Orientation
A possible glulam column installation error is to set the column in the wrong orientation. Every column has a strong axis and a weak axis, depending on the direction of the laminations. For example, a 4-ply 2” x 6” glulam column has similar dimensions in both directions. If it is turned 90 degrees from the prescribed placement, then the primary wind loads will be applied to the weak axis, which has a lower bending capacity than the strong axis.
Information supplied by Rigidply Rafters Inc.
Notching Glulam Columns
Notching should only be performed under the direction of the engineer of record. Notches in glulam members affect the bending capacity, as well as the shear capacity of a column. Chapters 3 & 5 of the 2018 National Design Specification for Wood Construction provide design parameters for the use of notches in glulam columns. Any special cutting or drilling of holes in a glulam column should be as directed by the engineer of record for the project in question.
Information supplied by Rigidply Rafters Inc.
Don’t Make These Mistakes
I have seen columns that were set upside down, leaving the untreated portion in contact with the soil. This is rare, but it does happen. Do not do this! The treated portion goes in the ground. I have seen columns installed turned incorrectly so the weak axis is toward the windward side. This mainly happens on the end walls where the framer wants to avoid a long column notch if the building has flush framing wall girts. This is not correct. The strong axis should always be turned towards the windward side. If you’re setting a three-ply glulam, you should see the individual plies, but there are exceptions. We manufacture a lot of specialty columns for very large rough openings or extended spacing. Glulam columns can be manufactured to be turned 90 degrees in application to get the strength of the larger section. The depth is where you get your strength on a 7-ply column for example. This application will not work with a nail lam column. Consult the engineer of record when in doubt.
Clay Erb, outside sales representative at Timber Technologies
FBN